

Utilities — manufacturing pack
The Manufacturing pack section writes the files a shop needs to make the open assembly. Each button knows which parts it is for, and everything lands in one Manufacturing folder beside the assembly.
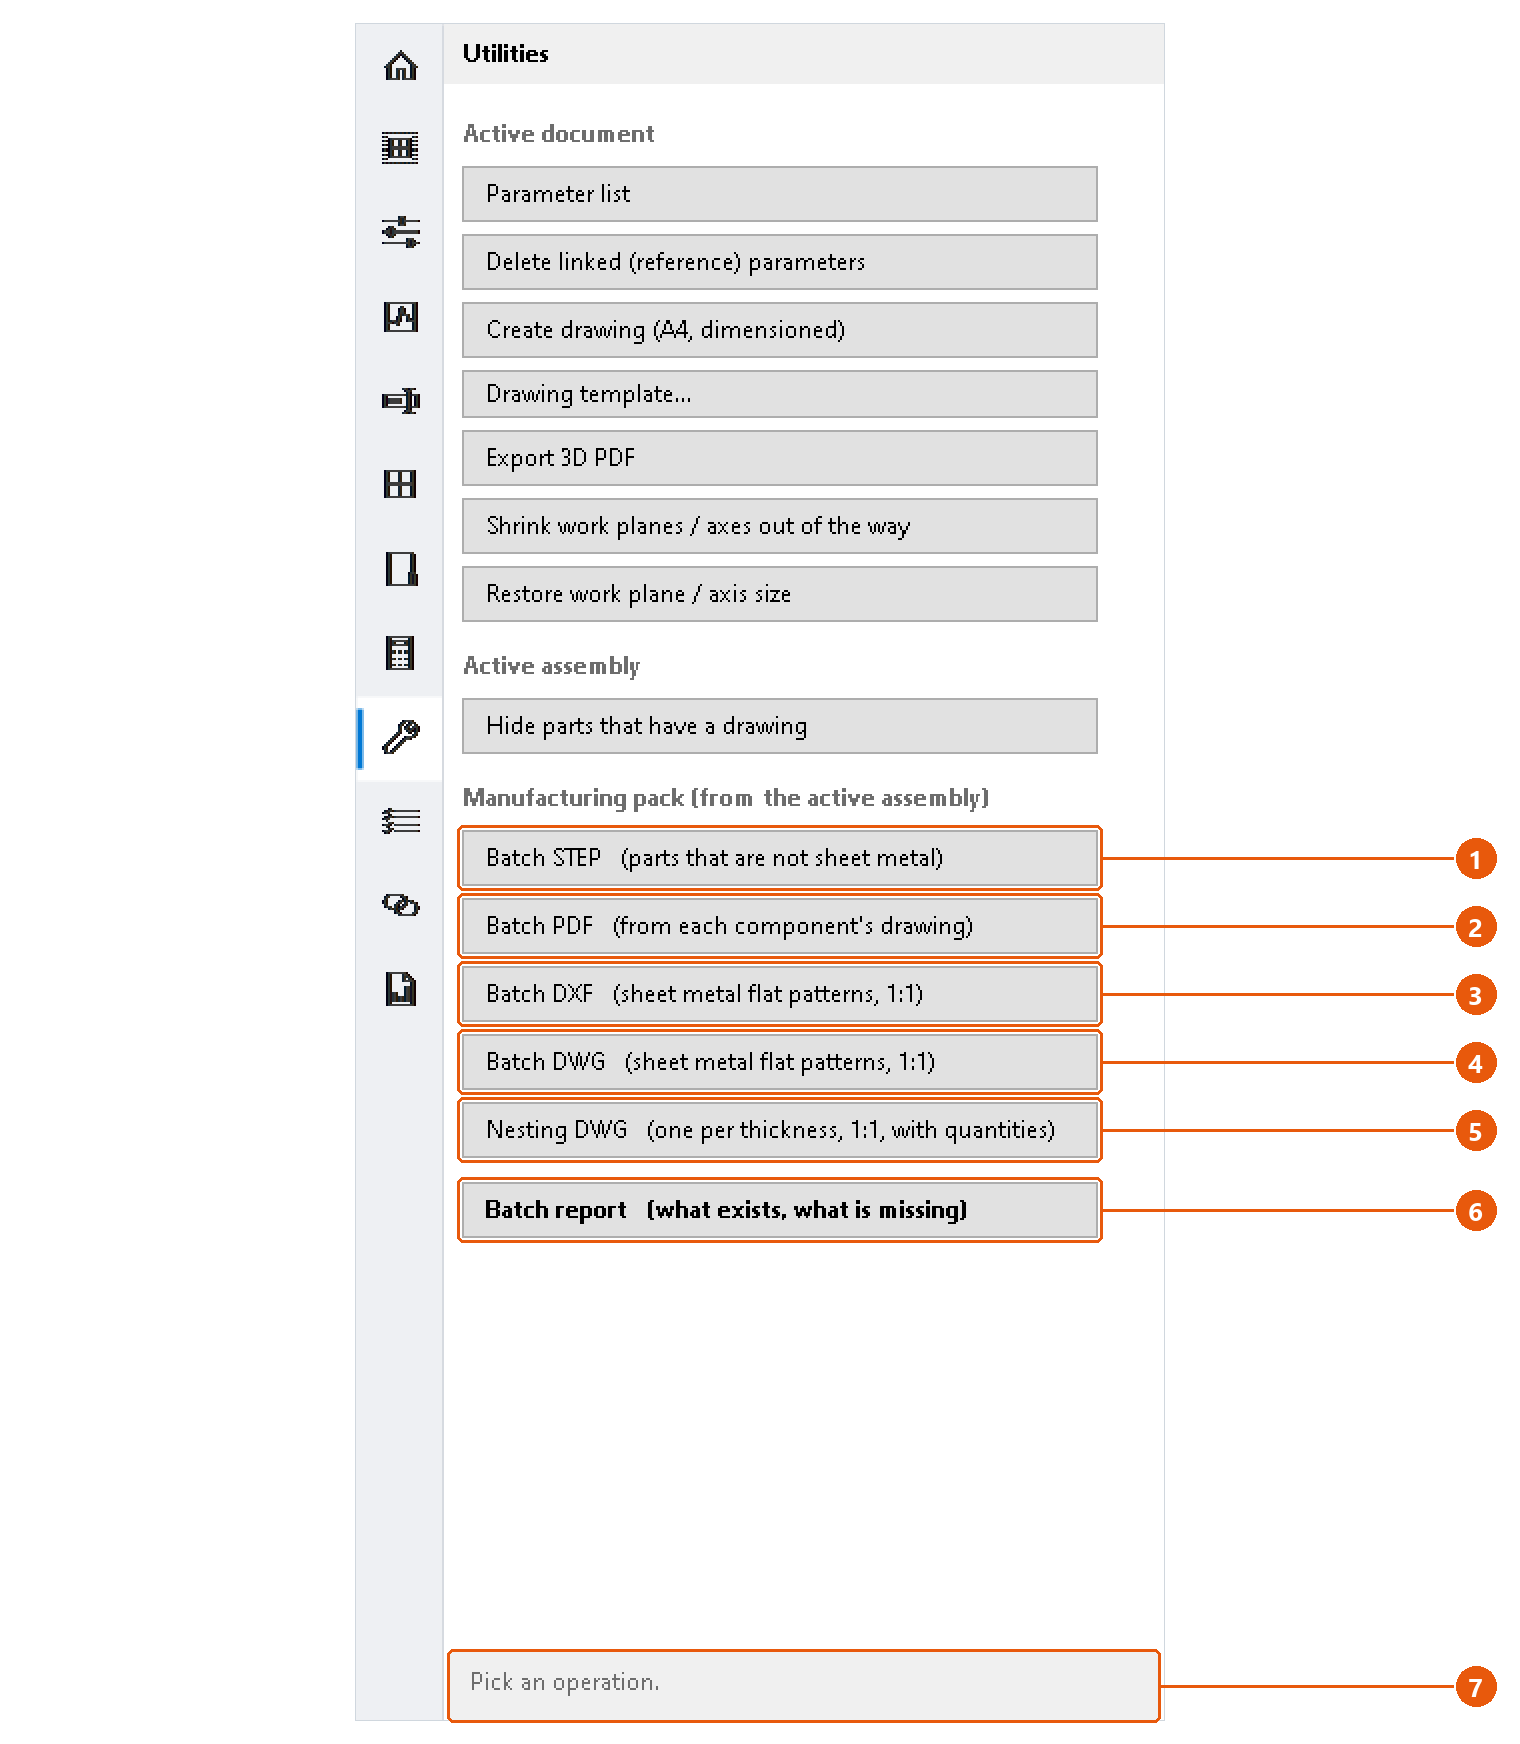
Export the pack
- Open the assembly and save it. The pack is written beside the saved file.
- Click Utilities in the icon bar.
- Press the export you need:
| Button | What it writes | Folder |
|---|---|---|
| Batch STEP 1 | One STEP file for every part that is not sheet metal. | Manufacturing\STEP |
| Batch PDF 2 | One PDF for every component that has a drawing beside it, exported from that drawing. | Manufacturing\PDF |
| Batch DXF 3 | The flat pattern of every sheet metal part, at 1:1. | Manufacturing\DXF |
| Batch DWG 4 | The same flat patterns as AutoCAD DWG. | Manufacturing\DWG |
| Nesting DWG 5 | One DWG per material thickness, every flat pattern on it at 1:1 with its part number and quantity. | Manufacturing\NESTING |
A progress window shows while the export runs; press its cancel button to stop. When an export finishes, its report opens on its own. The status line 7 repeats the summary and names the folder.
Flat patterns are written from the flat pattern's own geometry, not from a drawing view, so they cannot come out at the wrong scale.
Note:Suppressed components, and components marked Reference in the BOM, are skipped: nobody makes them.
Note: A sheet metal part with no flat pattern is unfolded for the export. If that part was open in Inventor, it stays unfolded and modified; the report says so in its Note column.
Read the report
Press Batch report 6 at any time to see what exists without exporting anything.
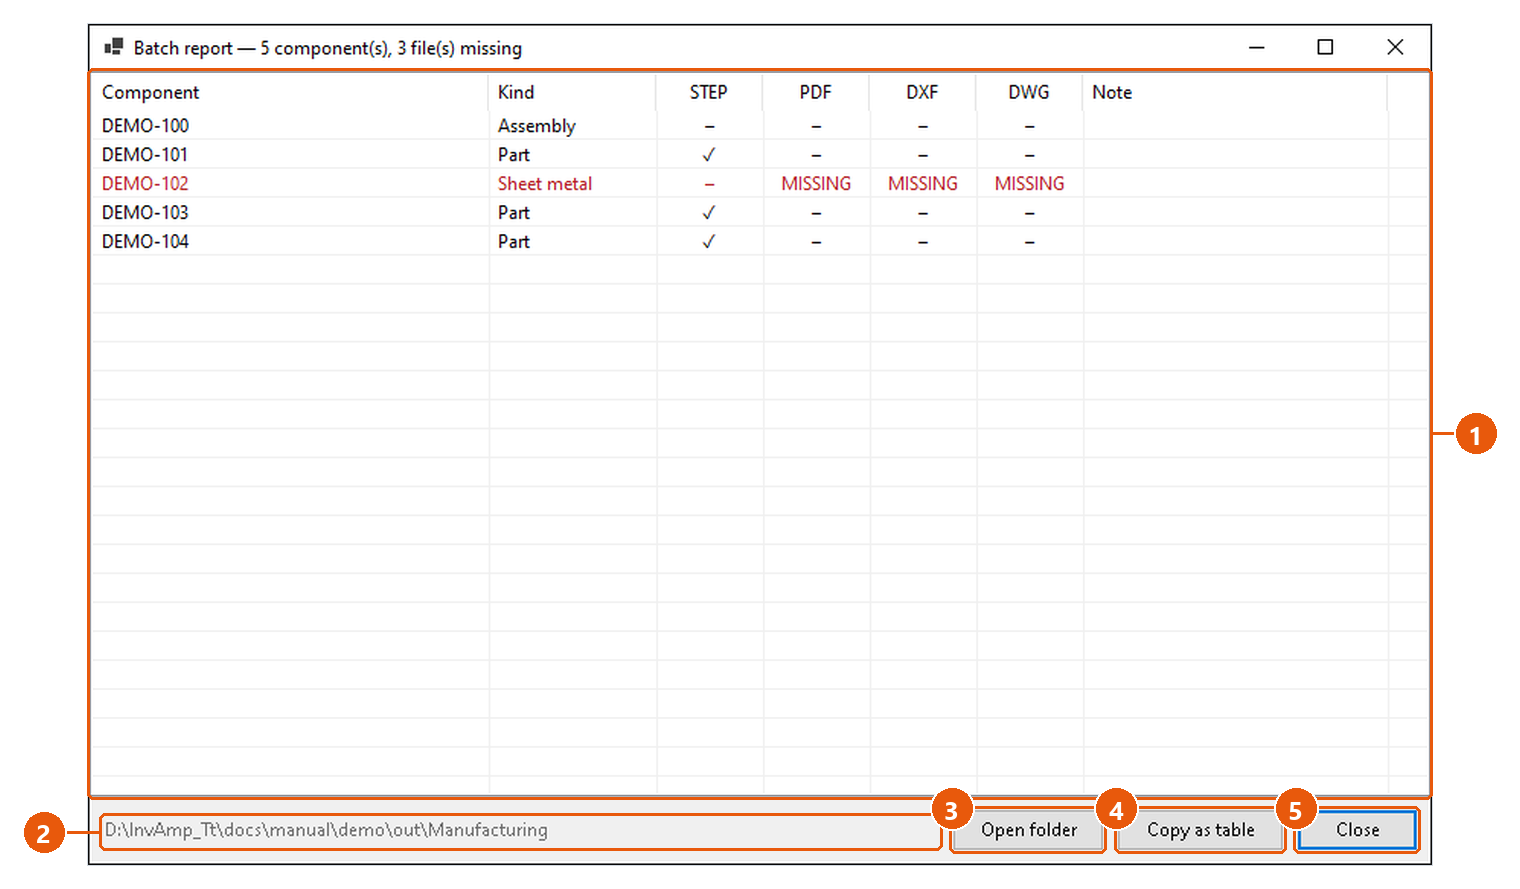
- Read the table 1. Each component has one column per format. A tick means the file exists,
–means the format does not apply, and MISSING in red means it applies but the file is not there. - The folder 2 is where the pack lives. Open folder 3 shows it in Windows Explorer.
- Copy as table 4 copies the report for a spreadsheet.
- Press Close 5.
Tip:Run Assembly Tools → Check → Sheet metal before Nesting DWG. It lists the parts whose flat pattern or thickness would come out wrong.