
Work Mode — screen capture
Save the current Inventor view as an image at any resolution, independent of your screen size. Or save four isometric views in one go.
Capture the current view
- Open the part or assembly and set up the view.
- Click Work Mode in the icon bar, then the Screenshot tab.
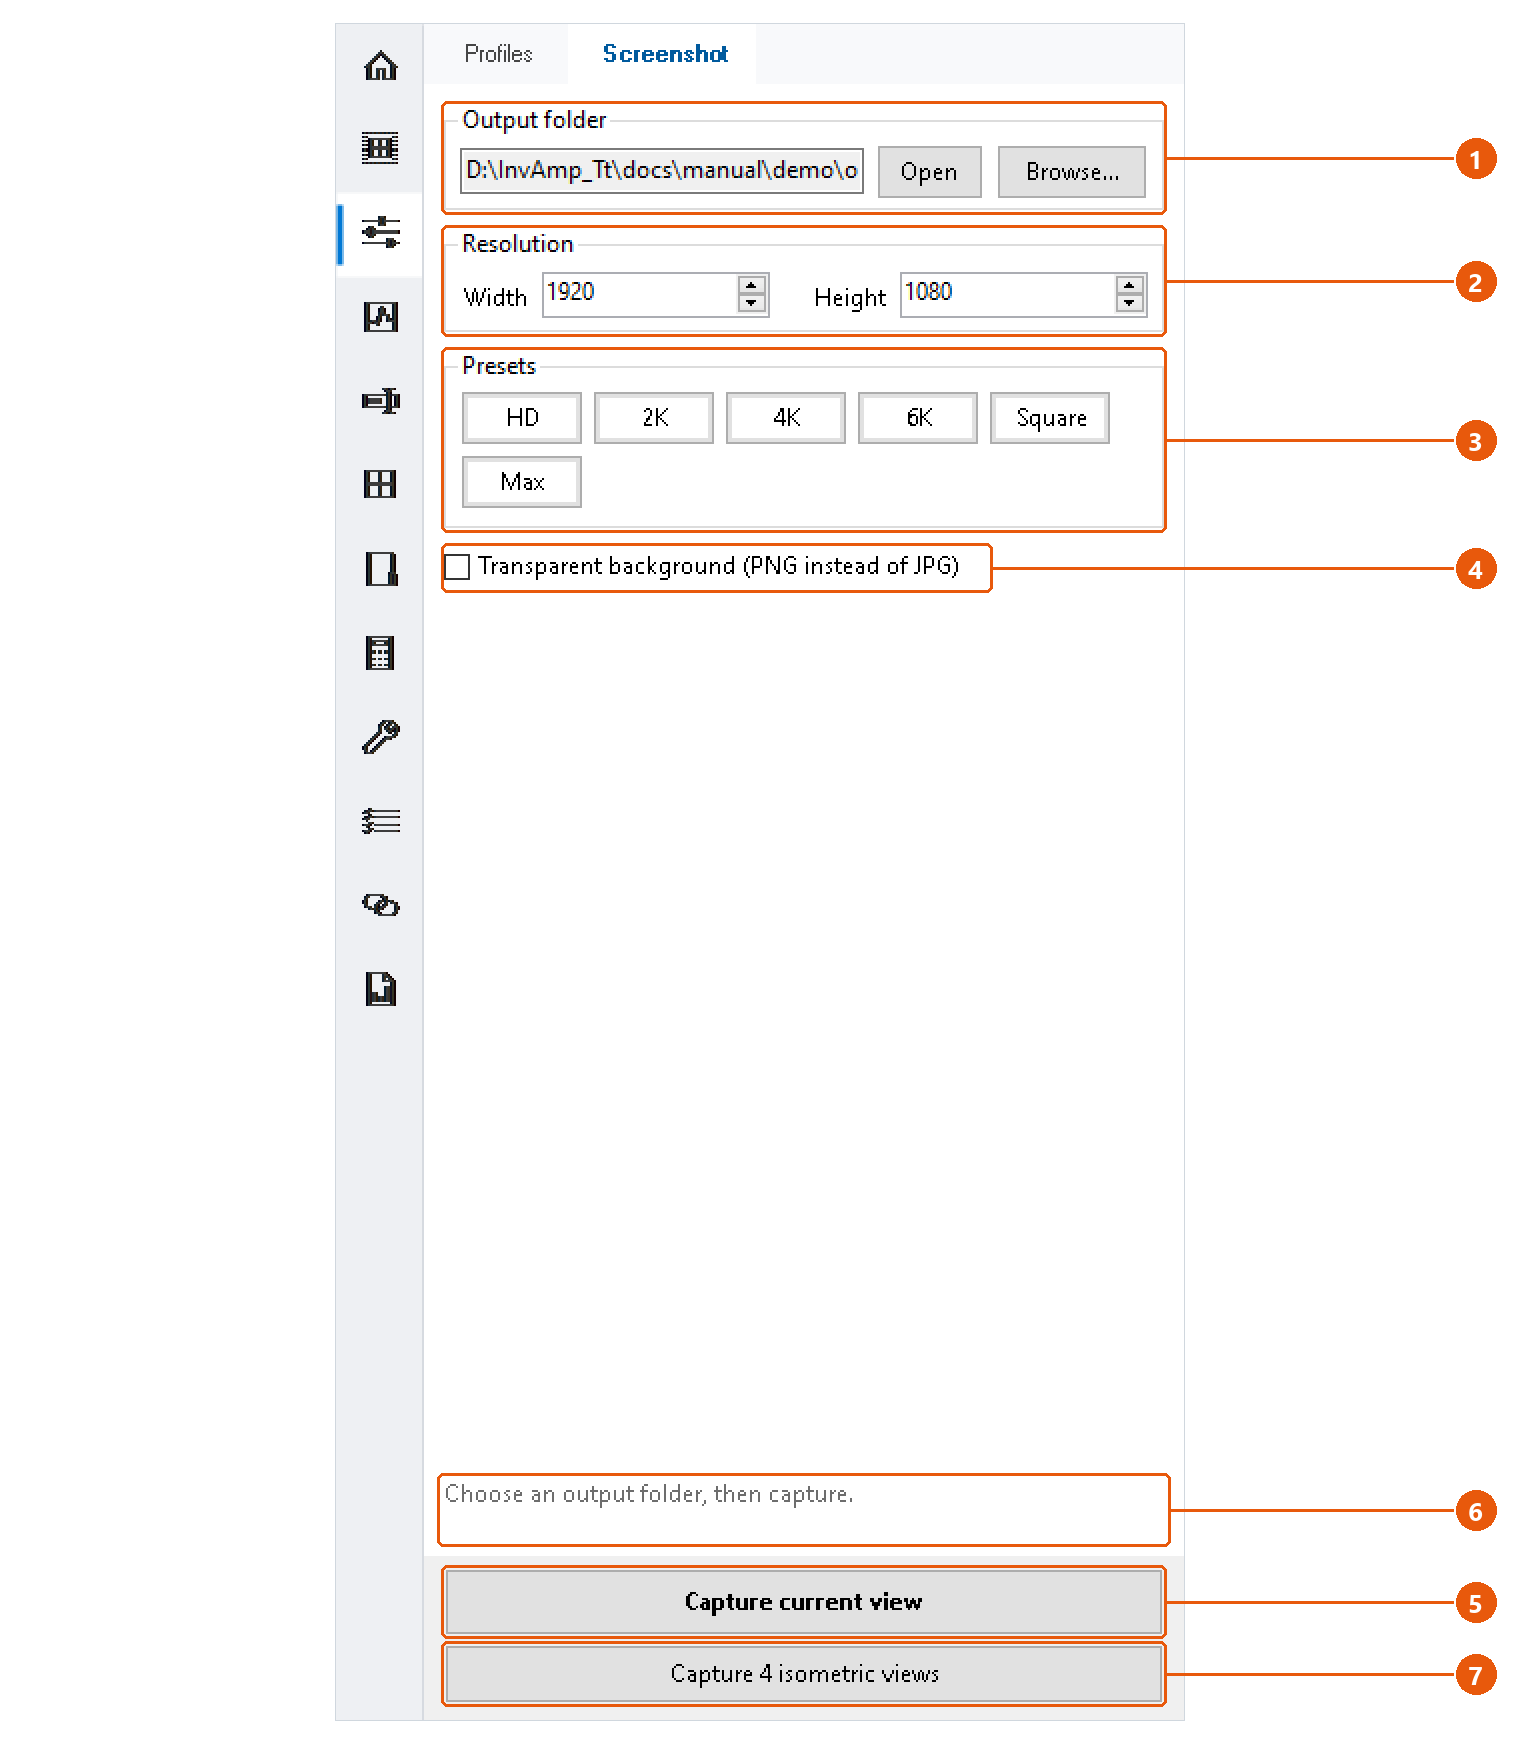
- Press Browse... and choose the output folder 1. Open shows the folder in Windows Explorer.
- Enter the width and height in pixels 2, or press a preset 3.
- Tick Transparent background 4 to save a PNG with no background. Otherwise the image is a JPG.
- Press Capture current view 5.
The status line 6 names the saved file. Click it to open the image.
The file is named after the document, followed by the date and time, for example DEMO-100_SS_261016_143005.jpg. Repeated captures never overwrite each other.
| Preset | Size in pixels |
|---|---|
| HD | 1920 × 1080 |
| 2K | 2560 × 1440 |
| 4K | 3840 × 2160 |
| 6K | 6000 × 3375 |
| Square | 2000 × 2000 |
| Max | 6000 × 6000 |
Capture four isometric views
- Choose the output folder, resolution and background as above.
- Press Capture 4 isometric views 7.
InvAmp looks at the model from above, from all four corners in turn: front right, front left, back left and back right. It fits the model each time and saves one image per corner, named ..._IsoTopFrontRight, ..._IsoTopBackLeft and so on. Your own view is restored afterwards, and the status line says how many images were saved.
Note:Without an output folder, capture stops and the status line asks you to choose one first.